
Setting Up A Windows Apache/Tomcat/LCDS Server
By Douglas McCarroll
(Note:December 2007 - I wrote this in October 2006 for FDS, but have updated it somewhat for LCDS. I suggest that you use the current stable release for all packages mentioned here.)
If you're going to learn LiveCycle Data Services (LCDS) and write LCDS webApps, using the integrated JRun server on your personal computer to run these apps will quickly lose its luster. You want to publish to the internet, right?
To my knowledge no web hosting company currently supports LCDS. You'll either have to rent a virtual private server (VPS) or get access to a server connected to the internet. Then you'll need to install LCDS. I've just gone through the process of setting up a server and installing Apache, Tomcat and LCDS, and have decided to share my experience. Hopefully this will be useful to others.
Please note that this isn't intended to be a complete how-to, for several reasons:
- I'm only covering installation on a blank-slate Windows machine. I'm recounting what I've done but make no attempt to cover all the possible permutations of already-installed software. If you don't have a blank-slate machine this article may still be helpful but your milage may vary.
- I've set up a server in my home office only, so we're not covering remote installs on a hosted server.
- I started this process with relatively little knowledge of Apache, Tomcat, etc. In some ways this fact may make this post more helpful to similar neophytes, but I certainly wouldn't want to represent myself as an expert.
My goal is to set up a server configured as a normal production server. This means:
- Apache web server
- Tomcat servlet container
- LCDS
- Java Open Transaction Manager (JOTM)
- Configured for full production, not development
First Lesson - Read The LCDS System Requirements
I assumed that I could skip this step :-) and proceded to install Apache and Tomcat on my Windows 2000 machine. Eventually I realized that I needed to reformat my hard drive, upgrade my machine to Windows 2000 Server, and start over.
Also, you really do need at least 512 Meg of memory.
LCDS system requirements are here.
Install Your Operating System
I'm not going to attempt to explain this in detail - that subject takes up multiple chapters in various books. I pretty much used the default settings, except that I made sure that I didn't install the included Internet Information Server (IIS) as I assumed that it would conflict with Apache. I also disabled various other services that can be included in this OS as all I really wanted was a machine that would run Apache, etc.
Install Java Development Kit, Standard Edition
You can find it here.
Install Apache & Tomcat, then Test
I downloaded the Apache Win32 Binary installer and Tomcat Core Windows executable installer, then installed them. Very simple. For Apache I specified "for all users, as sa service". Tomcat does this by default.
Be sure to record the admin password that you specify for Tomcat.
Restart your server.
You can test Apache by pointing your web browser at:
- On the server: http://localhost
- On a connected machine: http:/[your_server's_IP_address]
In both cases you should get a web page that says "It Works!". How exciting. :-)
Next, increase Tomcat's memory :
- Double-click the Apache Tomcat icon in the system tray
- Select the Java tab
- Set Initial memory pool to 300+ MB
- Set Maximum memory pool to 512 MB
- Select the General tab
- Stop, then Start Tomcat
Now test Tomcat:
- On the server: http://localhost:8080/manager/html
- On a connected machine: http:/[your_server's_IP_address]:8080/manager/html
One of two things will happen:
- Tomcat's Web Application Manager will ask for a username ("admin") and password. Once you supply these it should appear in your browser.
- You'll get a "page cannot be displayed" or "unable to connect" message. This probably indicates that you have firewall software installed, which is good!
Configure Apache to forward certain requests to Tomcat
You will note that we just tested Tomcat by attempting to access the server's 8080 port. Tomcat listens to port 8080 by default but we don't want our users to access our webApps this way. Instead, we'll tell Apache to forward certain request to Tomcat.
Specifically, we'd like requests for the LCDS samples from Adobe and requests for the apps we write to be forwarded to Tomcat. On the other hand we'd like Apache to continue to handle requests for static web pages, image files, etc. as that's what it excels at.
In the remainder of this section I'll outline a somewhat quick-and-dirty approach to configuring Apache so that it does this. A Tomcat expert would probably use a more sophisticated approach. You can try to parse out the details of a more expert approach here, here and here if you like, but be warned that these docs aren't very clear, and some details haven't been updated for Tomcat 5.5. The approach that I offer below works, and should be sufficient to get you started.
Before we start, let's run a test. Point your browser at one of these URLs:
- On the server: http://localhost/manager/html
- On a connected machine: http://[your_server's_IP_address]/manager/html
You should get a message saying that Apache can't find the page. We'll fix this.
Abbreviations:
- I'll be referring to your Apache root folder as [Apache_Root] in the paragraphs that follow. In my case this is at C:\Apps\apache_2_2_6\
- I'll also be referring to your Tomcat root folder as [Tomcat_Root]. In my case this is at C:\Apps\tomcat_5_5_25\
Download the Apache mod_jk 1.2 module's binary file. I had to make the following selections to get the correct file:
- a) "JK 1.2 Binary Releases"
- b) "win32"
- c) "jk-1.2.26" (use the most recent stable release)
- d) "mod_jk-[release#]-httpd-2.2.4.so" - Note that I used the most current stable Apache release at the time of this writing, which was 2.2.6. The 2.2.4 in this file name indicates that it was released for 2.2.4. Hopefully it will work! :)
Rename the file as "mod_jk.so" and put it into [Apache_Root]\modules\.
Next, we need to modify Apache's configuration file. Open [Apache_Root]\conf\httpd.conf in a text editor. Add these lines to the end of the file:
<IfModule !mod_jk.c>
  LoadModule jk_module "c:/Program Files/Apache Software Foundation/Apache2.2/modules/mod_jk.so"
</IfModule>
JkMount /manager/* ajp13
JkMount /samples* ajp13
JkMount /flex* ajp13
JkMount /flex-admin* ajp13
Now, create a text file in [Tomcat_Root]\conf\jk\ called "workers.properties". Put this text into it and save:
worker.list=ajp13
worker.ajp13.type=ajp13
worker.ajp13.host=localhost
worker.ajp13.port=8080
Next, stop and restart both Apache and Tomcat. You can do this by double-clicking their icons in the system tray, then clicking the appropriate buttons.
Let's re-run the test we performed a short while ago:
- On the server: http://localhost/manager/html
- On a connected machine: http:/[your_server's_IP_address]/manager/html
Tomcat's Web Application Manager should reappear on your screen. So far, so good.
Note that the JkMount directives above include directives that will forward requests for the LCDS samples that will be installed in the next step. For example, "JkMount /samples* ajp13" tells Apache to forward all requests for all locations that start with "[website_root]/samples". Note the asterisk wildcard.
You'll want to add your add additional directives for your own apps. For example, I'll add a directive that says "JkMount /bw* ajp13". This will allow me to create folders for my apps whose names start with "bw".
Disable access to Tomcat through Port 8080
Now that you no longer need to access Tomcat through port 8080, let's disable it. While not essential, this enforces an "access Tomcat only through Apache" rule and will make your server a bit more secure.
- Open [Tomcat_Root]/conf/server.xml
- Search for "8080" until you find an instance within a <Connector> element
- Comment out that element
- Save, then stop and restart Tomcat
- That's it!
Install LiveCycle Data Services
Download the file here. Install as a J2EE Web Application (not with integrated JRun) - instructions are here.
Step 10 of the instructions says "Deploy the flex, samples, and flex-admin web applications by using your application-server-specific deployment method." Here's a Tomcat-specific translation:
- Look in your root LCDS folder. On my system I use C:\Apps\lcds_2_5_1\
- You'll see three .war files:
- flex.war
- flex-admin.war
- samples.war
- Go back to the Tomcat Web Application Manager page (http://localhost/manager/html). Use the "War file to deploy" option to select, then deploy, each of these three files
- Restart Tomcat (via icon in system tray)
- Refresh the Tomcat Manager web page
You should see something like this:
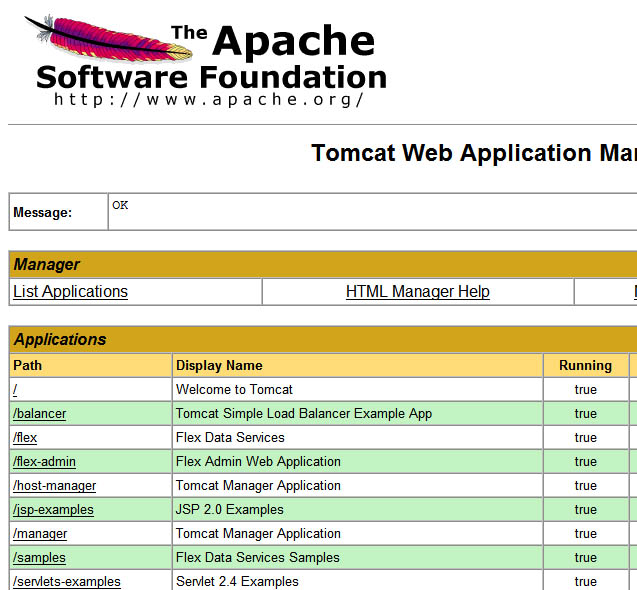
Click on /samples, then select "Collaboration Dashboard", then "Run The Dashboard". If everything is working properly you should be able to open multiple instances of this RIA, and changes made to any instance should be reflected - through the miracle of LCDS - to all other instances.
Now get some friends on multiple continents to open the RIA. Have fun!
If you can successfully run this app from multiple locations (or even multiple computers on your network) then things are going well. But we still have a few steps that we need to take before all the sample RIAs will work.
Tomcat-Specific Installation Details For LCDS
Adobe's instructions for these steps are pretty clear so I'm going to simply refer you to them and add a few comments:
- Step 1: The file that you download will be an archive file with a .tgz extension. You can use WinZip or, I assume, many other programs to unpack this.
- Step 3: Replace "webapp-name" with "samples" in order to get the LCDS samples working. You'll have to create a similar file for any webApp you deploy that utilizes JOTM, and replace the string "samples" in the file name and in the file with your webbApp's name.
- Step 4: You've already done this (above).
- Step 5: If you started with a blank-slate machine and followed the steps above you should have JDK 1.5.x installed, and should be able to ignore this step.
- Steps 7 & 8: I'm not covering these steps in this article.
You're Done!
I hope that this has been helpful. If you have any suggestions for improvements please contact me. (Please bear in mind the limited scope of what I'm trying to cover - e.g. a blank-slate Windows machine, etc.)
Next, you can Explore Your New LCDS Server...